An Overview of the Grasshopper Pose
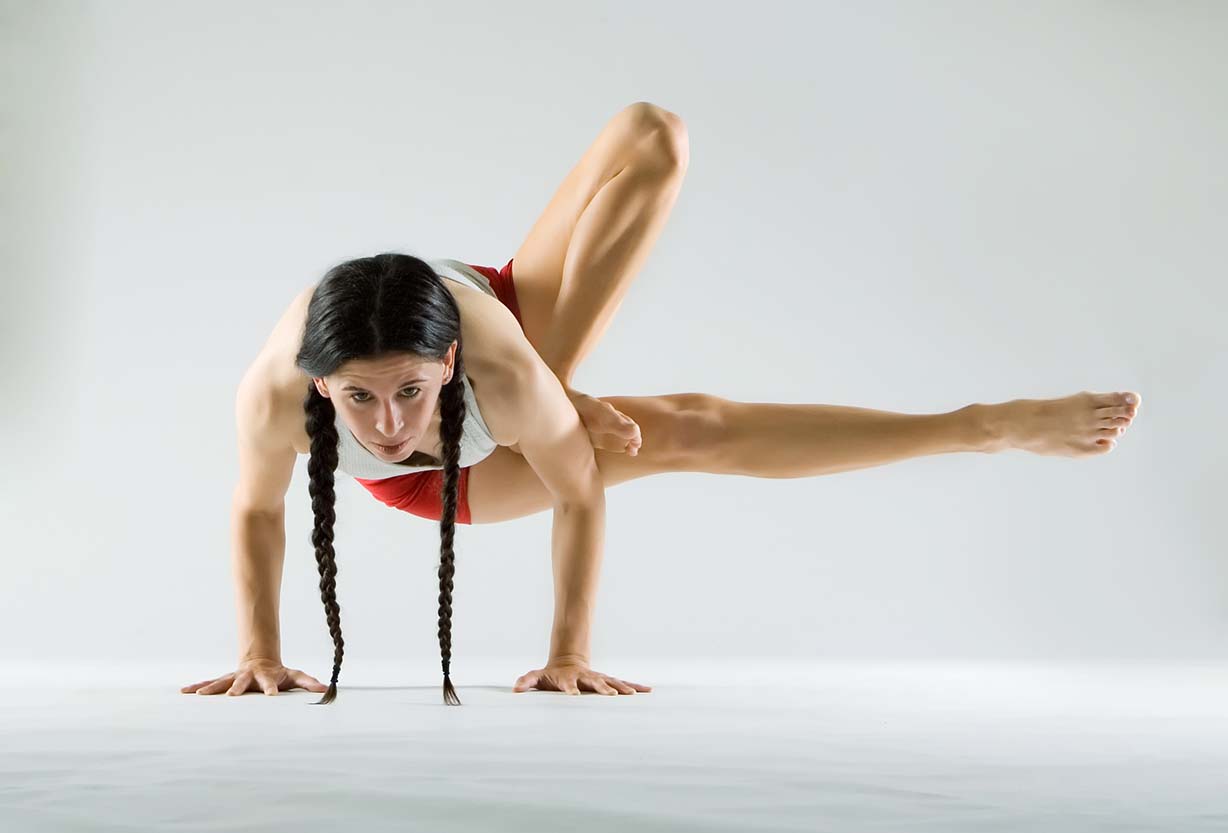
The intermediate-to-advanced yoga stance known as “Grasshopper Pose,” or “Parivrtta Bhekasana” in Sanskrit, tests your strength and flexibility. It combines arm balancing, hip opening, and twisting stance. The name of this dynamic asana comes from the fact that it resembles a grasshopper.
Benefits of the Grasshopper Pose
There are several advantages to Grasshopper Pose for the body, mind, and soul. Among the principal benefits are:
Benefits to the body:
- bolsters the muscles of the shoulders, arms, and core.
- expands and stretches the thighs, groin, and hips.
- enhances coordination and balance.
- improves cleansing and digestion.
- increases shoulder and spinal suppleness.
Advantages for the Mind and Emotion:
- increases boldness and self-assurance.
- eases tension and quiets the mind.
- improves concentration and focus.
- encourages a calm and peaceful inner state.
Safety Measures and Readying
Even though Grasshopper Pose has many advantages, you should always proceed with caution, particularly if you’re a novice or have any underlying medical issues. The following are some safety measures and setup instructions to keep in mind:
- Use Sun Salutations and light stretches to help your body warm up.
- Pay attention to your body and honor its limits.
- Refrain from exercising when you’re hungry.
- Throughout the position, pay attention to alignment and keep your core muscles active.
If necessary, use blankets or blocks as supports to provide support.
Before attempting this posture, check with a yoga instructor or medical expert if you have any ailments related to your wrists, shoulders, or knees.
Detailed Instructions for Doing Grasshopper Pose
Positioning Oneself:
- Seated with your legs out in front of you, start the exercise.
- Bring the sole of your right foot to the outside of your left hip while bending your right knee.
Arm Position:
- With your fingers pointing forward, place your hands on the mat next to your hips.
- Raise your hips a little off the floor and apply pressure with your palms.
Leg Alignment:
- Bring your left leg up to your chest in a bent position.
- Place your left foot underneath your upper arm on the right.
Maintaining equilibrium:
- Elevate your hips while bending forward and contracting your core.
- Stretch your left leg straight back slowly, maintaining it parallel to the floor.
- Hold your head up and take deep breaths.
Typical Errors to Steer Clear of
- forcing the posture without doing the necessary warm-up or planning.
- lumbar strain, which might result from overarching the lower back.
- hunching over or rounding off the shoulders.
- either holding one’s breath or tense the muscles of the jaw and face.
- omitting the warm-up positions and adjustments.
Different Grasshopper Pose Variations
Several versions of Grasshopper Pose are available to accommodate varying skill levels among practitioners. Typical variants include the following:
- Maintaining the foot on the floor and the rear leg bowed is known as the half-grasshopper pose.
- Flying Grasshopper Pose: Taking a step off the ground with both feet while maintaining an arm balance.
- Grasshopper Pose on One Leg: This pose involves balancing on one leg and straightening the other leg back.
Advice for Doing the Grasshopper Pose
- Throughout the posture, keep your breathing in mind and your rhythm consistent.
- Think of yourself like a grasshopper—light and buoyant.
- To provide stability and support, use a wall or props.
- It takes time and effort to learn this stance, so be patient and persistent.
Honor your development and treat yourself with compassion if you struggle to maintain the position.
Including the Pose of Grasshopper in Your Yoga Practice
Grasshopper Pose can be used as a stand-alone pose or as a component of a sequence in a well-rounded yoga practice. It is ideally performed following a body-warming exercise such as Pigeon Pose or Bound Angle Pose, which opens the hips. For a difficult yet gratifying exercise, you may also include it into a flow sequence with other arm balances and inversions.
Summary
Grasshopper Pose is a potent yoga pose that develops perseverance and mindfulness in addition to strengthening the body. You may experience the transformational powers of this dynamic position by adhering to perfect alignment, honoring your body’s limitations, and facing the journey with endurance and patience.
FAQs : Grasshopper Pose in Yoga
- Is Grasshopper Pose appropriate for novices?
Even though grasshopper posture is a more difficult posture, novices can practice gaining the required flexibility and strength with preparatory poses before trying it.
- How can the wrist soreness in Grasshopper Pose be avoided?
By equally spreading the weight between your fingers and palms, you may ensure correct alignment. Yoga blocks are another option for providing support for your hands.
- I’m pregnant. Can I do the grasshopper pose?
Pregnancy is not the time to engage in deep twists or severe abdominal involvement. See your physician before attempting any advanced yoga positions.
- In grasshopper pose, what happens if I can’t loop my foot under my arm?
You can adjust the posture by maintaining your rear foot on the floor or by encircling your foot and arm with a strap for support.
- In order to notice development, how often should I perform the grasshopper pose?
Maintaining consistency is essential. Practice on a regular basis and pay attention to your body’s indications as you gradually increase the length and intensity of your workouts.